


In greenhouse farming, achieving a healthy and productive crop begins with clean, disease-free soil. Soil is often the primary carrier of harmful pathogens such as fungi, bacteria, nematodes, and weed seeds. One effective and eco-friendly method of disinfection is solarization, which uses the power of sunlight to sanitize soil before planting.
In this article, we’ll explore what soil solarization is, why it’s important, how to do it correctly, and the key benefits and limitations of this simple yet powerful technique.
Why Is Soil Disinfection Important in Greenhouses?
Greenhouses create warm and humid environments, which are ideal not only for plant growth—but also for the proliferation of soil-borne diseases and pests. If the soil is not properly treated before planting:
Plants may grow slowly or become stunted
Diseases like Fusarium, Pythium, Rhizoctonia, or bacterial wilts can spread quickly
Yields will decrease significantly
The need for chemical pesticides increases, leading to higher costs and potential environmental harm
Therefore, soil disinfection is essential, especially for high-value crops, seedling production, or microgreens cultivation.
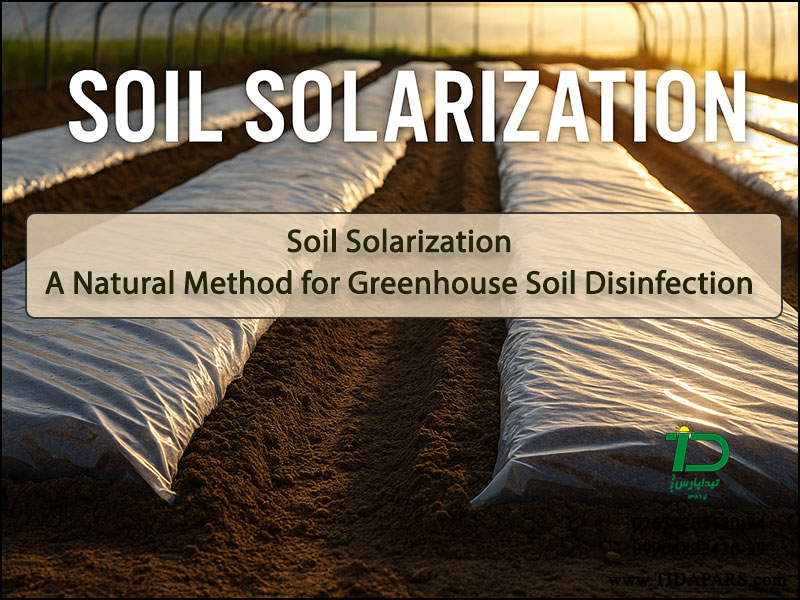
What Is Soil Solarization?
Soil solarization is a non-chemical method of soil disinfection that uses solar heat energy to kill pathogens and weed seeds. The process involves covering moist soil with transparent plastic for 4 to 6 weeks during the hottest part of the year. This traps solar radiation and increases soil temperature to levels that destroy or suppress soil pests and disease-causing organisms.
Key Benefits of Soil Solarization
✅ Chemical-free and environmentally friendly
✅ Reduces soil-borne diseases and pests
✅ Kills many weed seeds
✅ Low-cost and easy to implement
✅ Can be used in both greenhouses and open fields
✅ Improves overall soil health by stimulating beneficial microbes
Step-by-Step: How to Solarize Soil in a Greenhouse
To achieve effective results, follow these steps carefully:
1. Prepare the Soil
Remove plant residues, rocks, and weeds from the soil surface
Till the soil to a depth of 20–30 cm and level it
Irrigate the soil thoroughly to reach field capacity—moisture is essential for heat penetration
2. Cover with Transparent Plastic
Use clear polyethylene film (30–50 microns thick)
Lay the plastic tightly over the soil surface with no wrinkles
Seal the edges with soil or weights to trap heat and prevent airflow
3. Duration of Solarization
Solarization should last 4 to 6 weeks during peak summer (e.g., July–August)
In very hot regions, 3 weeks may be sufficient
The plastic must remain undisturbed and intact throughout the process
4. After Solarization
Carefully remove the plastic
Avoid re-tilling or contaminating the soil
Plant crops as soon as possible to benefit from the sanitized soil
Factors Affecting Solarization Effectiveness
Sunlight intensity and ambient temperature
Soil moisture level
Length of exposure (minimum 3 weeks)
Soil type (sandy soils heat up faster)
Limitations and Considerations in soil solarization
Best suited for hot and sunny climates; less effective in cloudy or cool weather
Primarily affects the upper 15–30 cm of soil
Plastic film must be sealed and maintained properly
It reduces pathogen populations but may not eliminate all pests
Final Thoughts
Soil solarization is a simple, sustainable, and cost-effective solution for disinfecting soil in greenhouses. By using natural sunlight during the hottest months, growers can significantly reduce soil-borne diseases, improve crop health, and avoid the use of harmful chemicals. This method is especially useful for growers of seedlings, leafy greens, and other greenhouse crops who value sustainable and healthy production practices.
SEO Keywords: soil disinfection, soil solarization, greenhouse soil preparation, non-chemical soil treatment, solar heat disinfection, soil sterilization method, sustainable farming, organic pest control